Sketch
G2G2 SKETCH — THE COMPLETE GUIDE
A 3D building sketcher that runs in your browser. Nothing to install, no
account, works offline once loaded. Feet and inches or metric, switchable
any time. Built for a phone first.
You don't need to know any CAD. If you can describe a house out loud, you
can draw one here.
============================================================
1. THE FASTEST WAY IN
============================================================
Don't draw the outside walls by hand. Describe them.
1. Tools, then Build tools, then Paste a drawing.
2. Tap AI prompt, then Copy all.
3. Paste it into any AI chat. Then describe your building:
"A house 40 by 30 feet, 10 foot walls, a door in the middle of the
front with a window either side, 6 pitch roof."
4. Copy the reply, paste it in the box, tap Draw it.
Walls, door, windows and roof in about a minute.
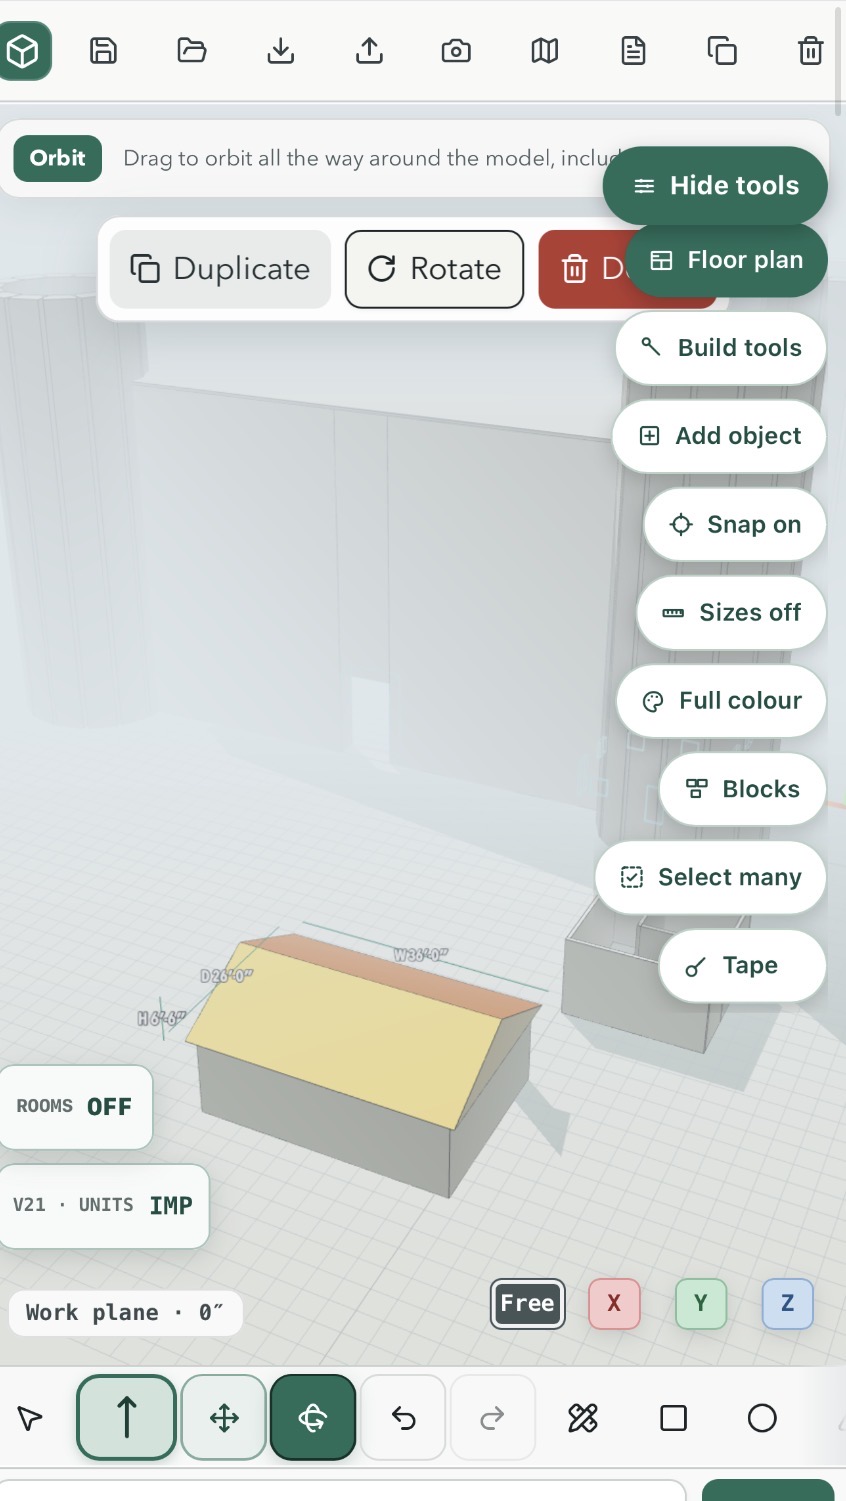
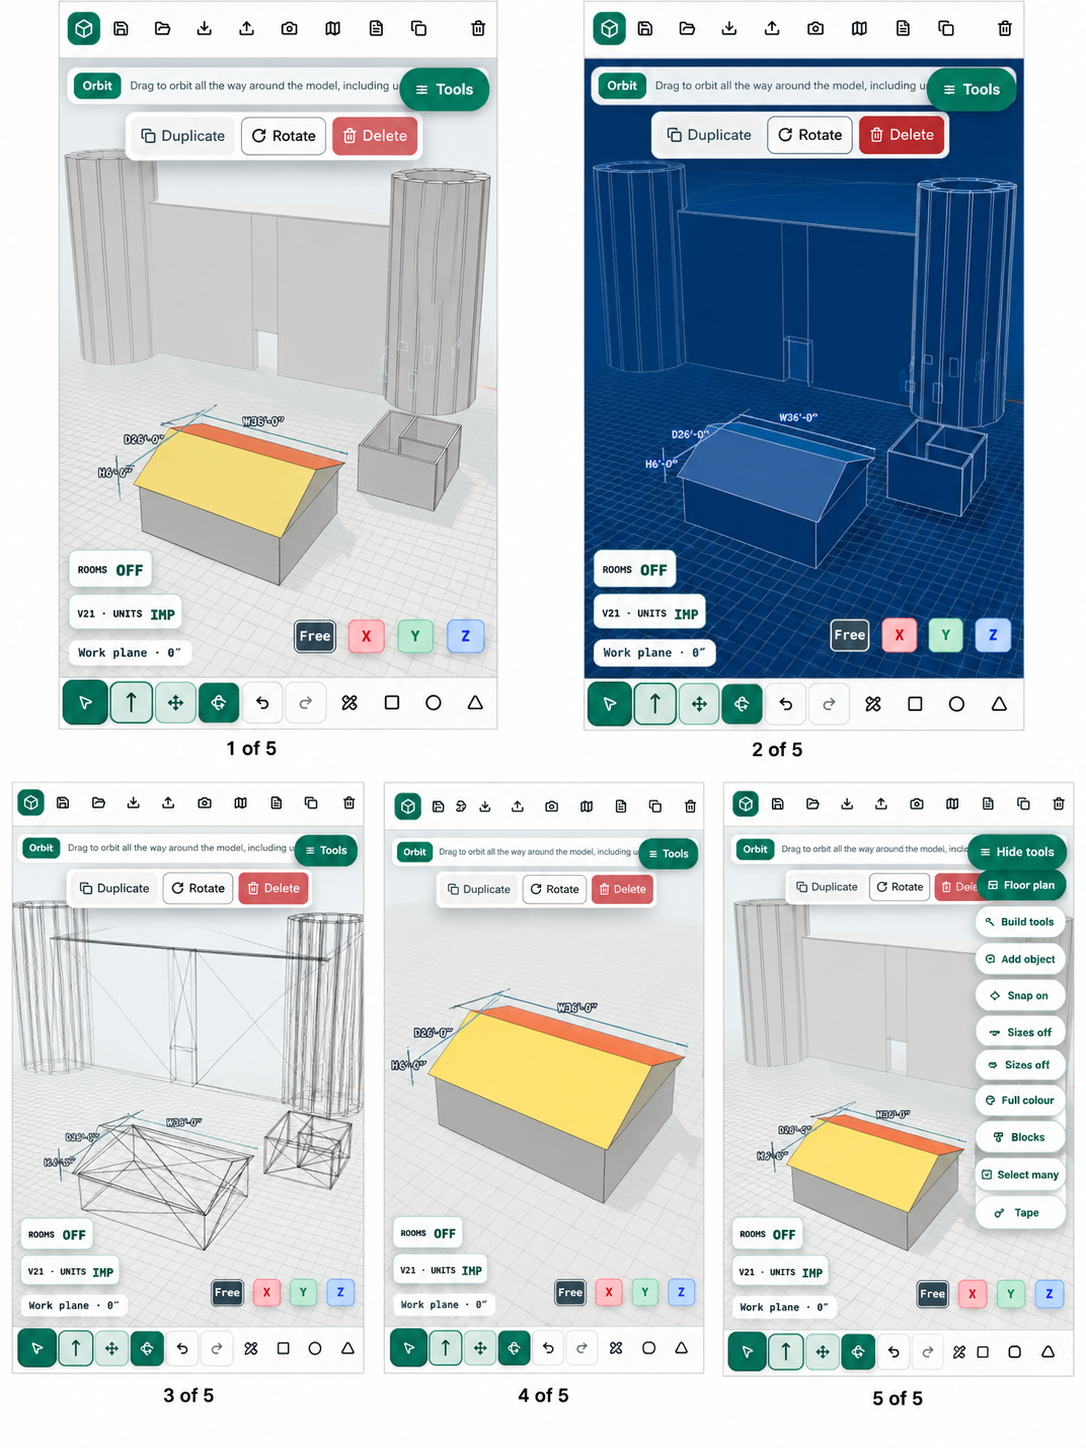
Tap Example to load a ready-made house. Tap it again for a castle with
four towers, which shows off round towers, battlements and exact door
placement.
GIVE IT ROUND NUMBERS. 40 by 30. Ten foot walls. You'll fix the real
sizes by dragging.
IT WON'T MAKE THINGS UP. Leave out a wall thickness and it says so
instead of inventing one.
============================================================
2. ALREADY HAVE A PLAN? IT LIFTS IT INTO WALLS
============================================================
Tools, then Floor plan. Open any plan image, JPG, PNG or WebP. Square it
up, set the scale off one known dimension, then tap Detect walls. It
finds the walls and turns them into real ones you can clean up by hand.
Set a thickness and a height, tap Build in 3D.
An old plan, a builder's drawing, a photo of something on paper. The
image stays on your device.
PDFs aren't read directly. Screenshot the page first.
============================================================
3. WHAT'S ON SCREEN
============================================================
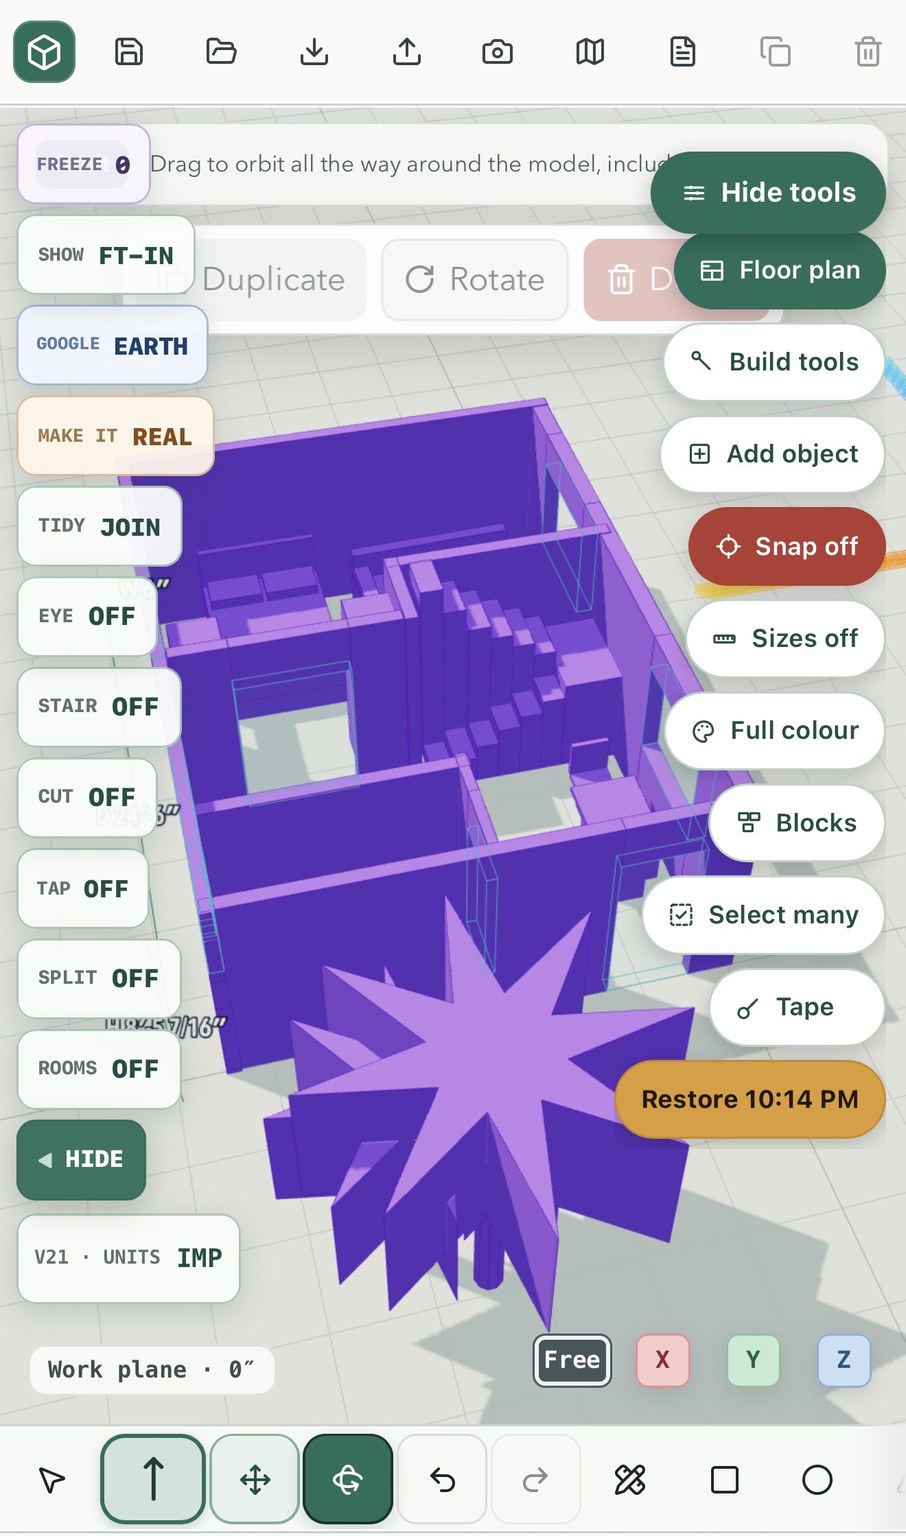
TOP ROW, left to right:
Floppy disk Save into this browser
Open folder Reopen the saved drawing
Down arrow Download the model as a file
Up arrow Open a model file
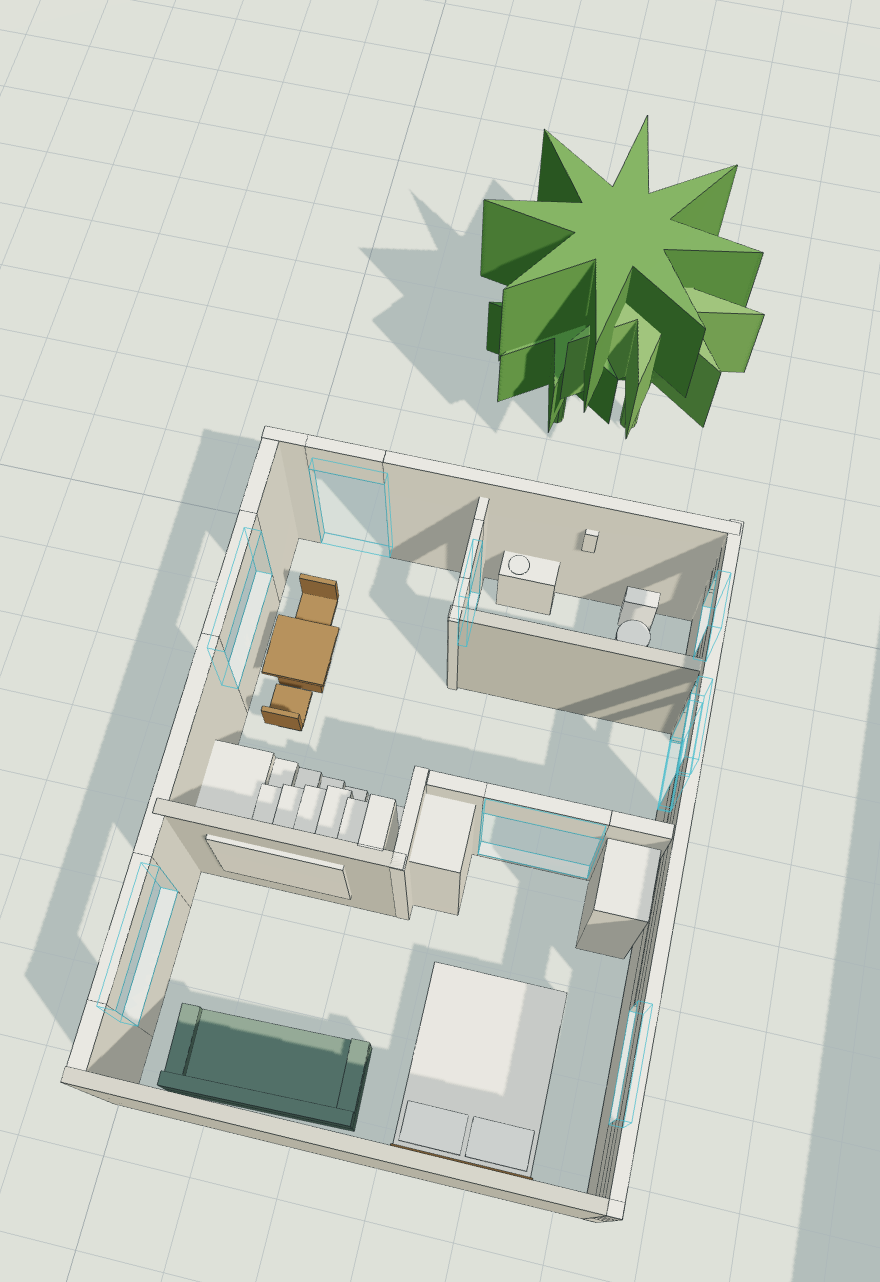
Camera Save a PNG of the current view
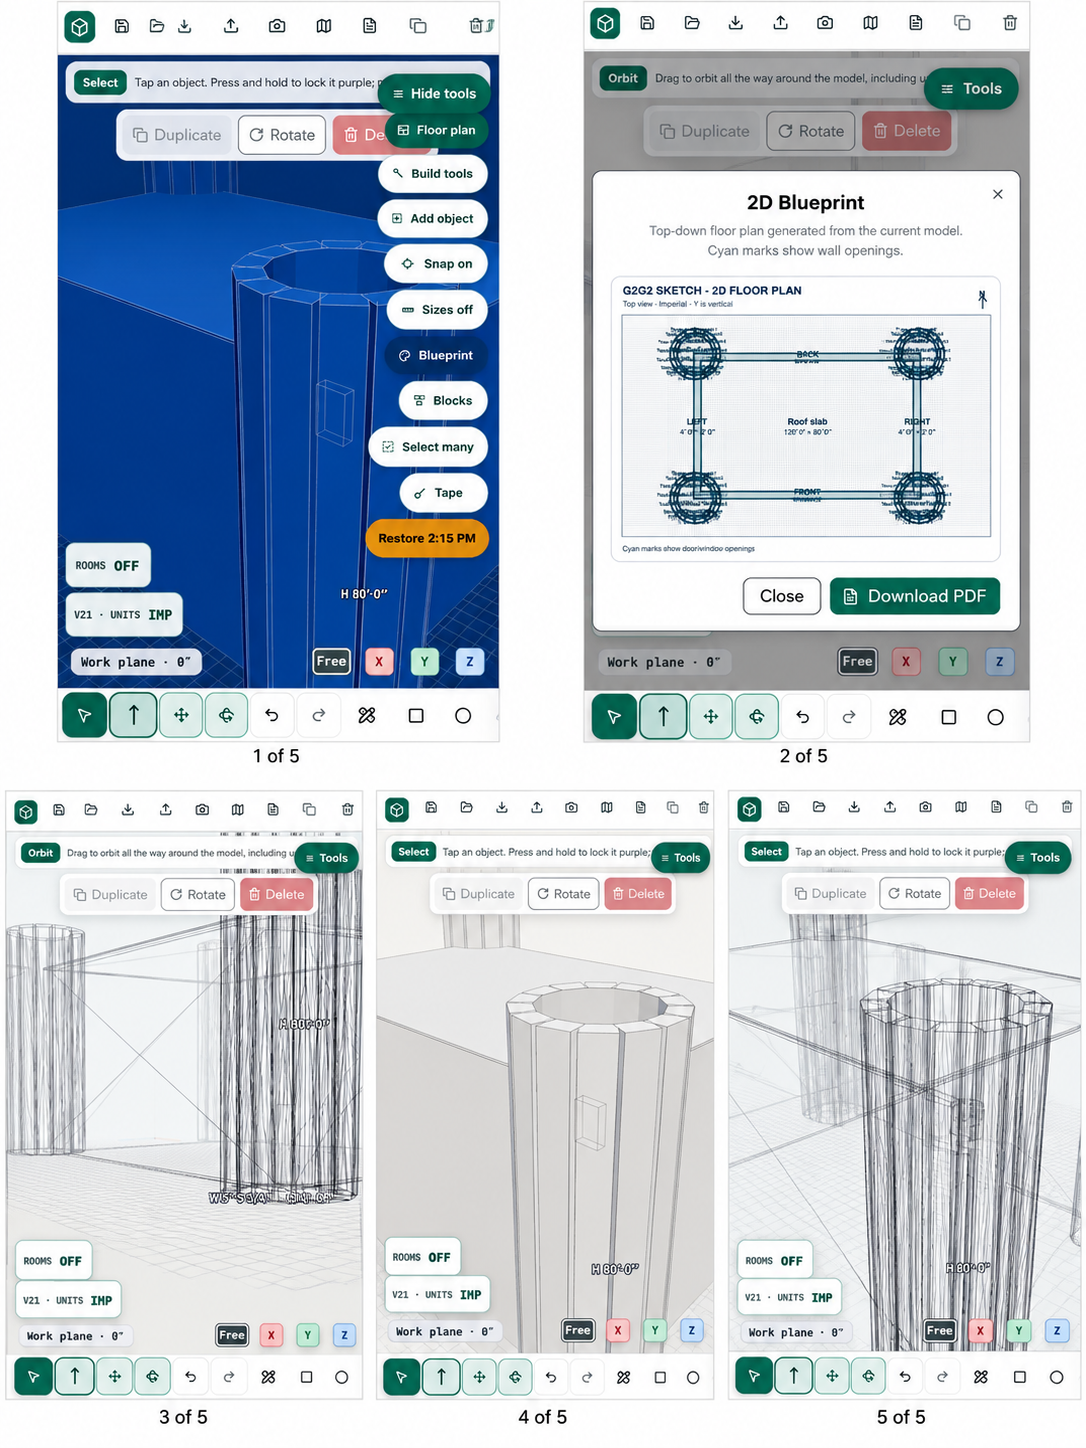
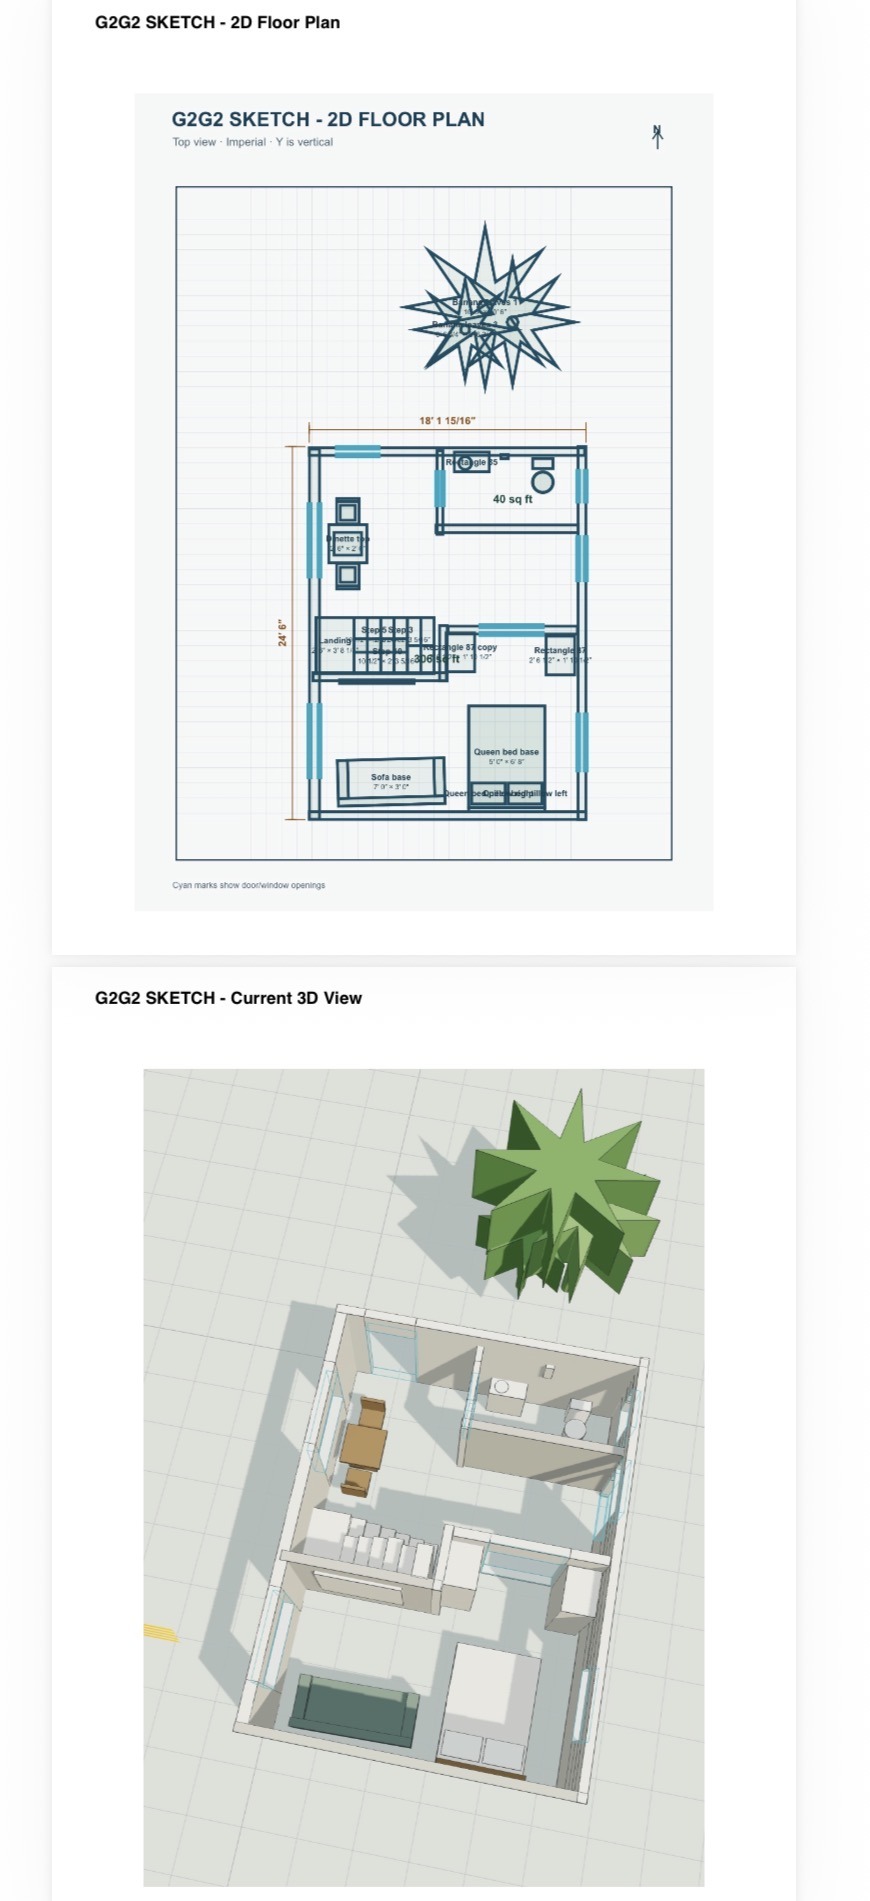
Folded map 2D Blueprint, a proper floor plan
Sheet of paper PDF plans
Two squares Duplicate the selection
Trash can Delete the selection
IMP / MET Feet and inches, or metric
Tools Everything else
BOTTOM ROW. Swipe it sideways on a phone.
Arrow cursor Select S
Crossed pencils Rough floor plan F
Square Square / rectangle R
Circle Circle C
Triangle Triangle T
Little house Gable roof G
Open door Window / door opening W
Up arrow Push/Pull P
Four arrows Move & snap M
Curved arrow Rotate Q
Orbit ball Orbit O
Undo / Redo sixty steps of history
Fit view frames everything
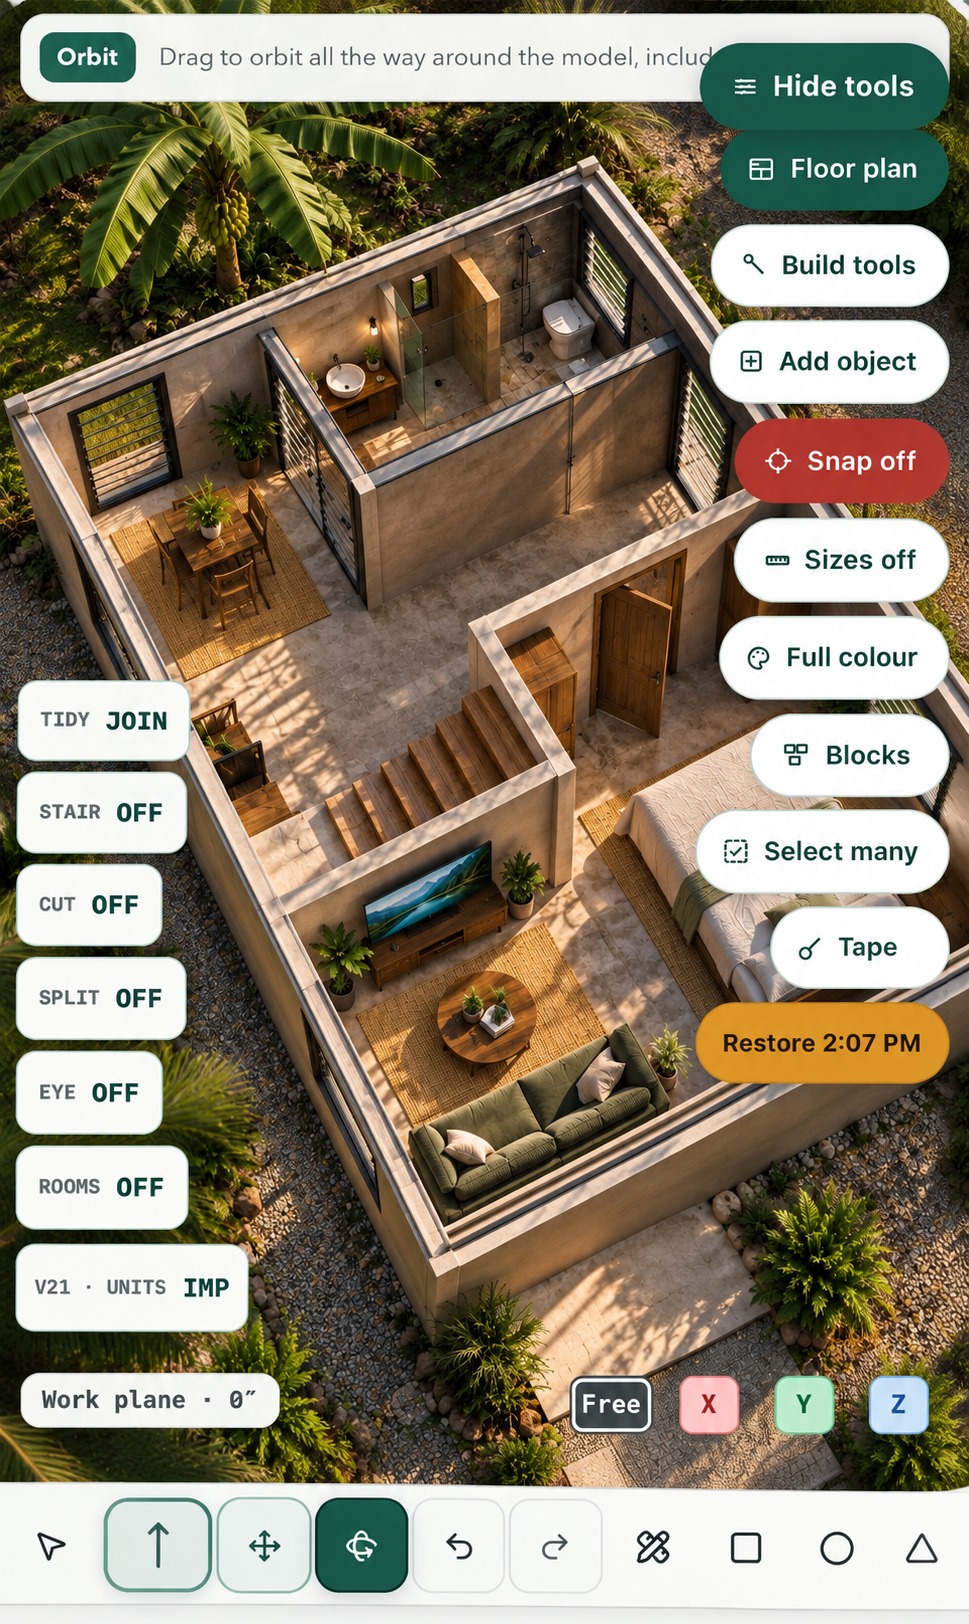
DOWN THE LEFT SIDE is a stack of chips. Hold any one of them for half a
second and it tells you what it does. The green HIDE button at the
bottom collapses the whole stack, the way Tools does on the right.
============================================================
4. THE CHIPS
============================================================
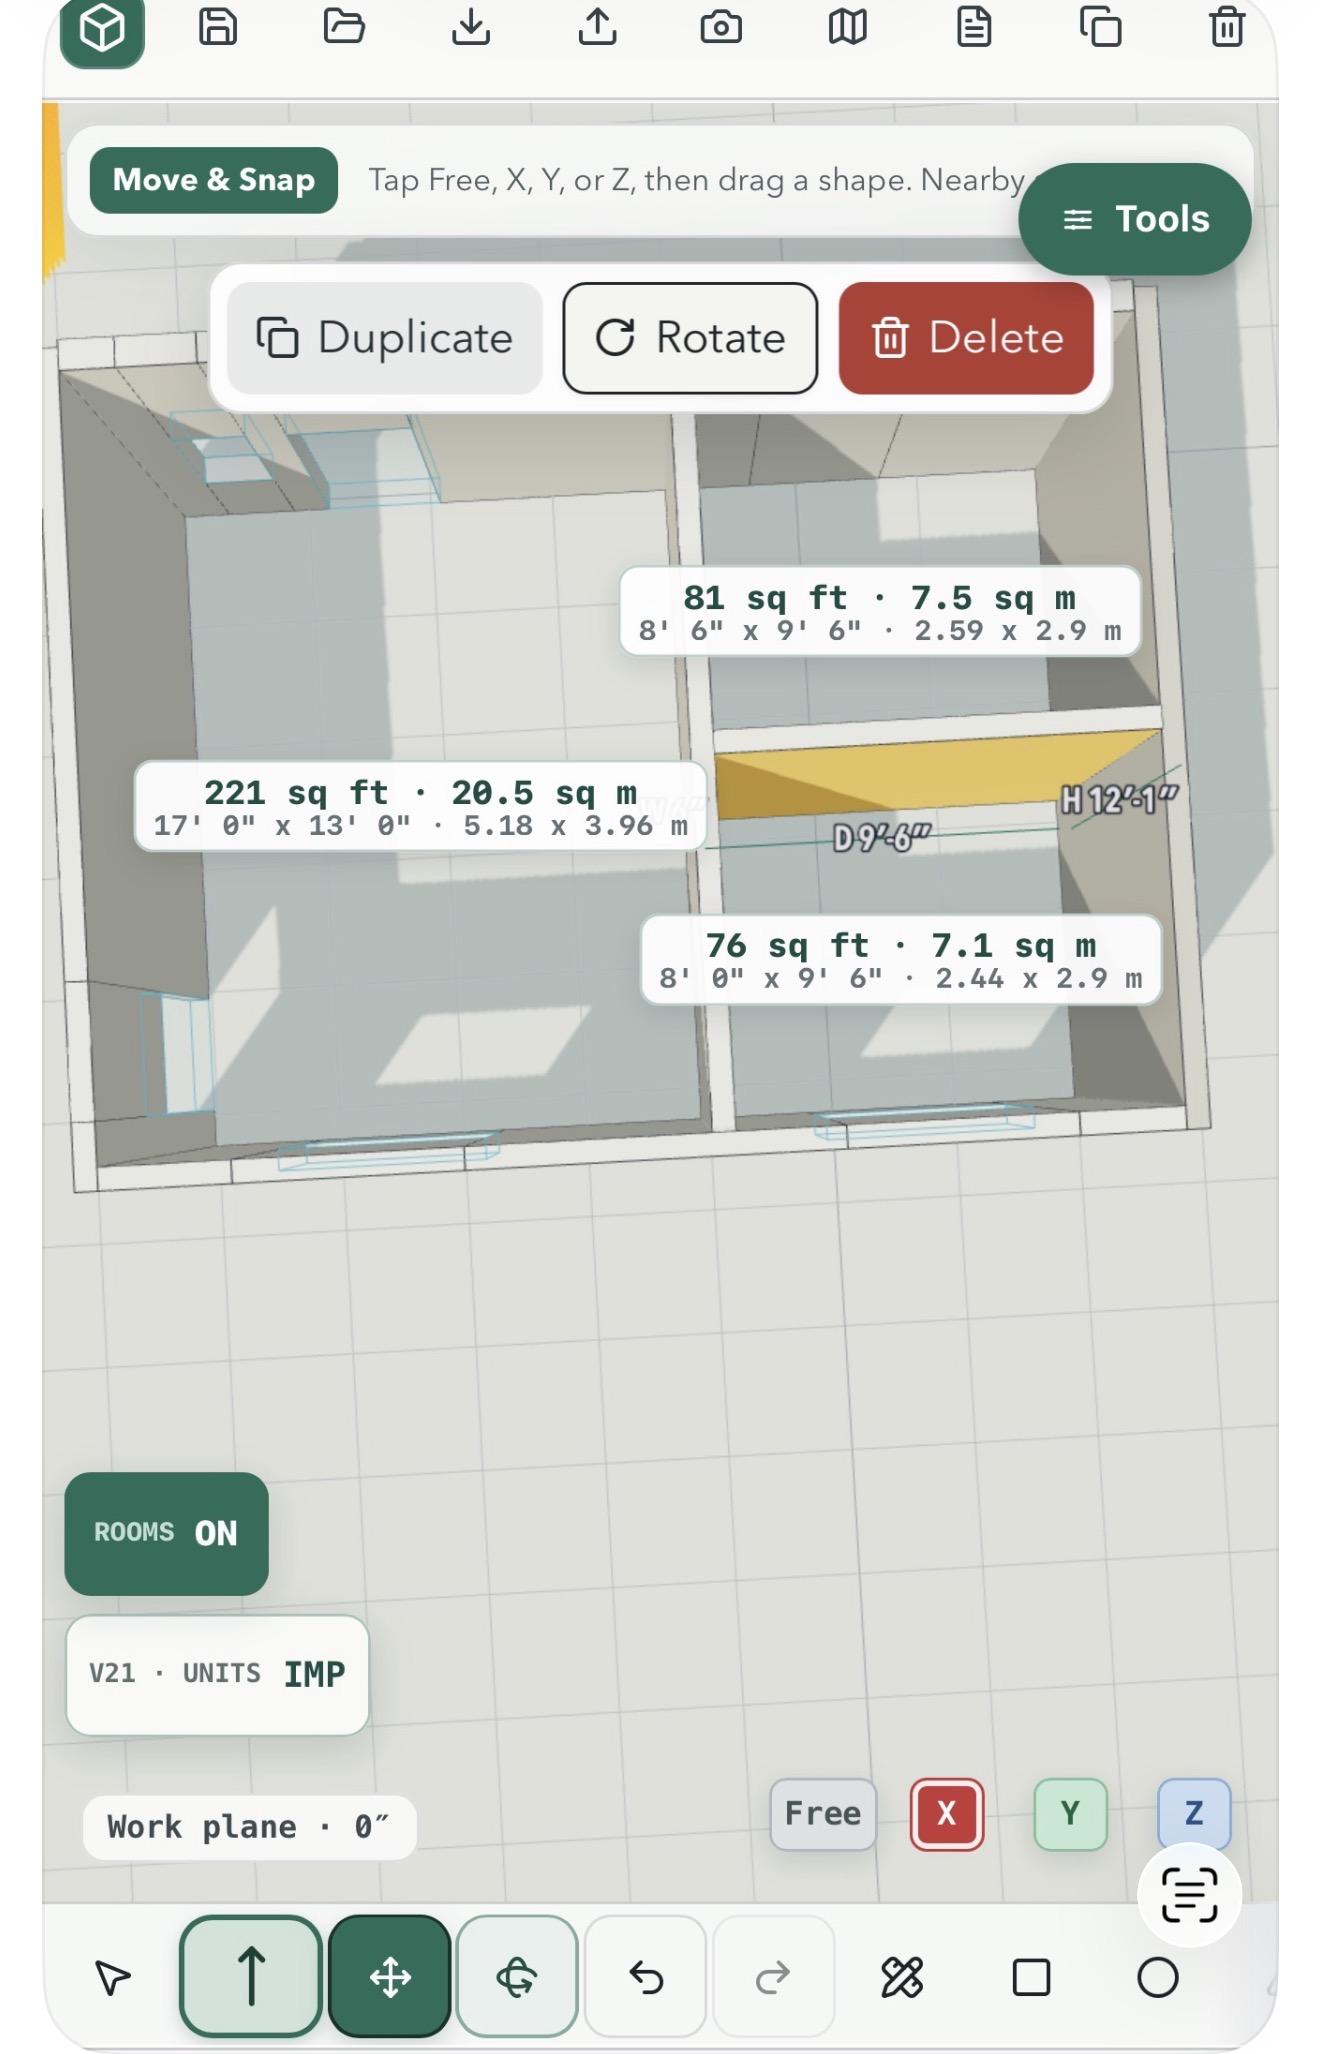
ROOMS Floats every enclosed room's area and its real wall-to-wall size.
Drag a partition and both sides update as you move it. You stop
measuring and slide the wall until the bedroom says 120.
If two rooms show ONE number, the wall between them has a gap.
That's free mistake-catching.
SPLIT Drag your finger across a room. A wall lands along your drag with
both ends buried in the walls either side, so it can't leave a
gap. Snaps to whole feet measured clear of the near wall, shows
both resulting areas as you drag, and offers you a doorway when
you let go. Split either half again.
TAP Pick Door, Window or Slider, then tap a wall where you want it.
It slides in if you tap near an end, refuses if it would land on
another opening, and tells you the measurement if the wall is too
short.
CUT Tap a wall anywhere. It becomes two pieces. Keep both, or delete
the half you don't want.
STAIR Select a box first. Fills it with a switchback and a landing at
half height, solving the rise and tread for that box. Toggle
which end the bottom flight starts from and which side it climbs.
If nothing fits it says what to change, with the number.
BUILD Runs the model through the order it would actually go up: slab,
walls to lintel, openings cut, walls to full height, roof, then
fittings. If your model has no slab or no roof it makes plain
ones so the sequence reads, and Keep slab & roof puts them in for
real. Done restores your model untouched.
EYE Drops the camera to 5 ft 10 in standing height so you can walk
the plan. Turn, walk, jump to any corner or the middle. Walls
don't stop you.
TIDY One tap. Squares up walls that are nearly square, grows wall ends
into proper corners, and raises walls to match their neighbours.
It never shortens or cuts anything down.
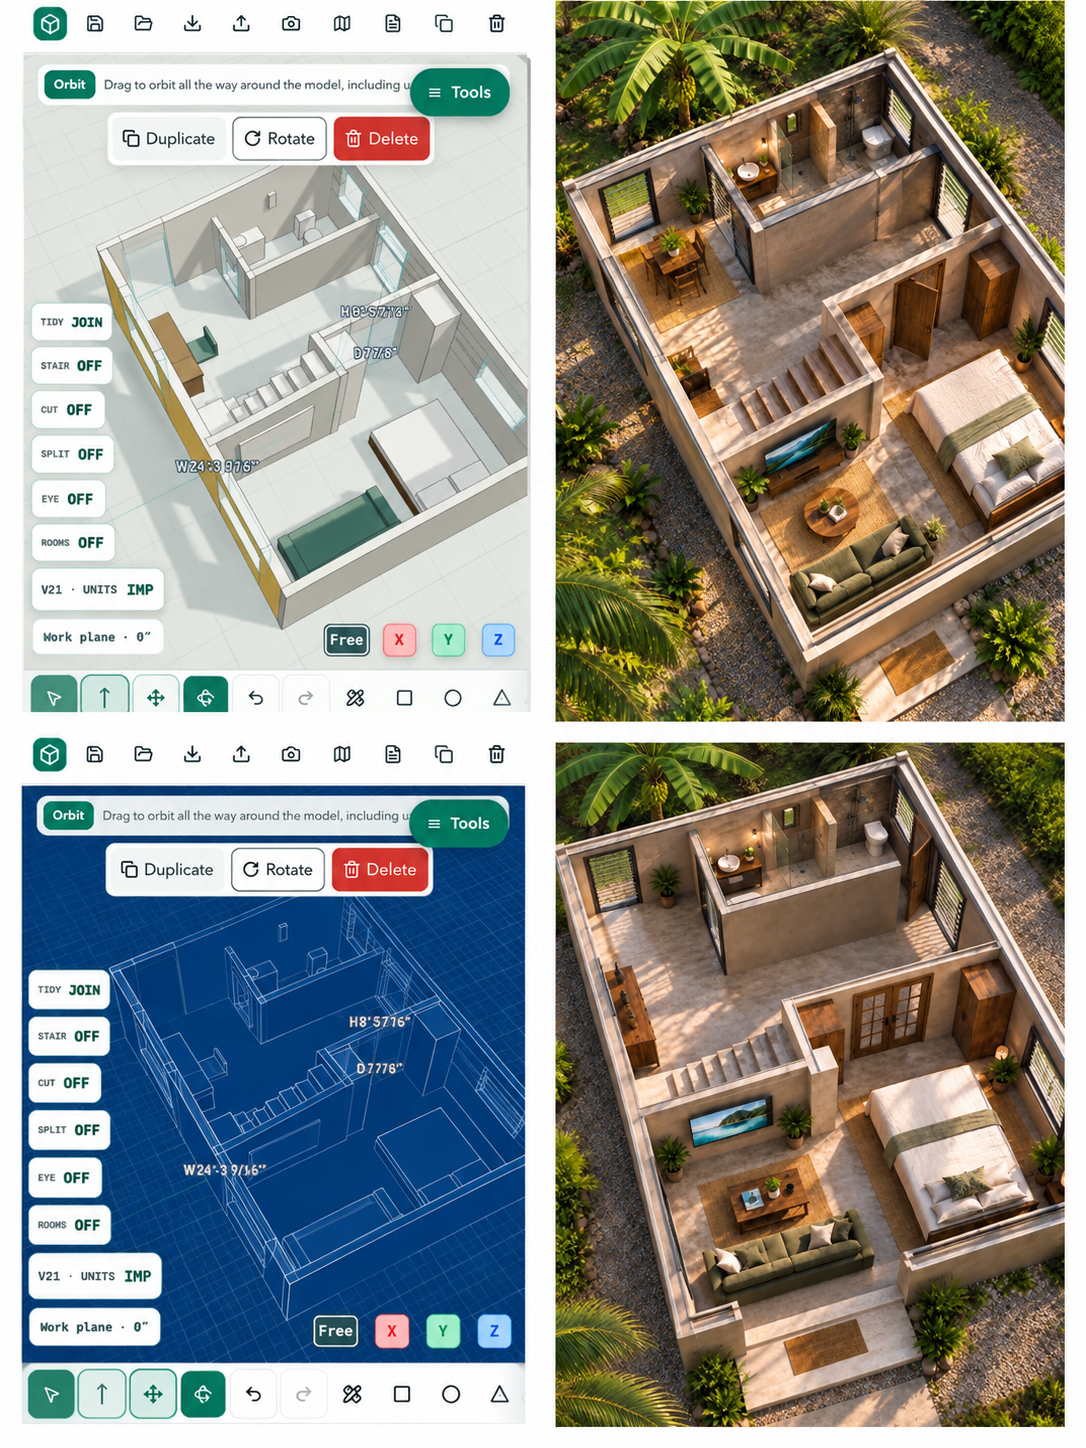
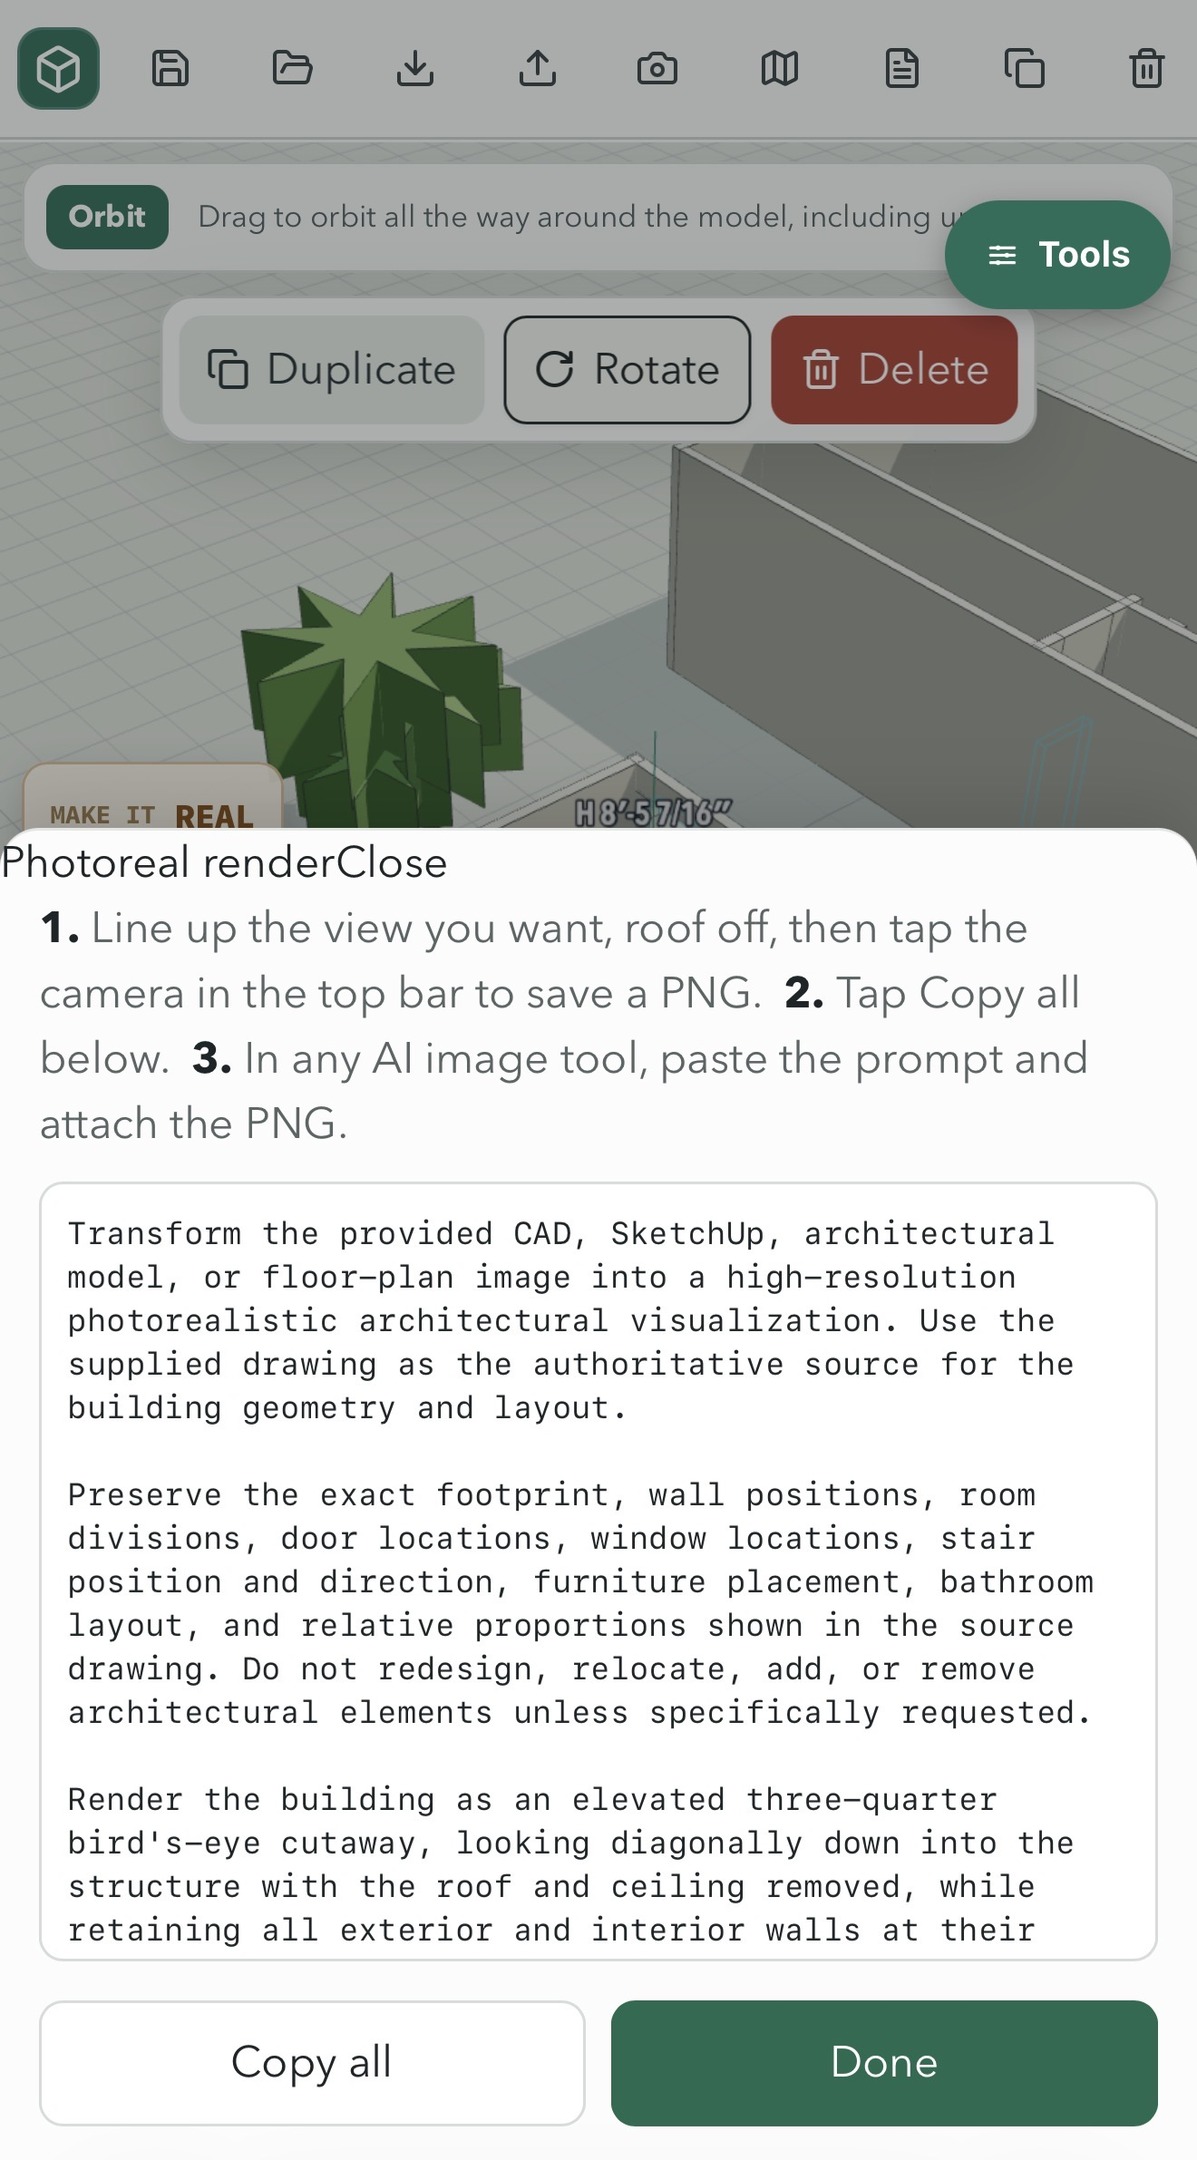
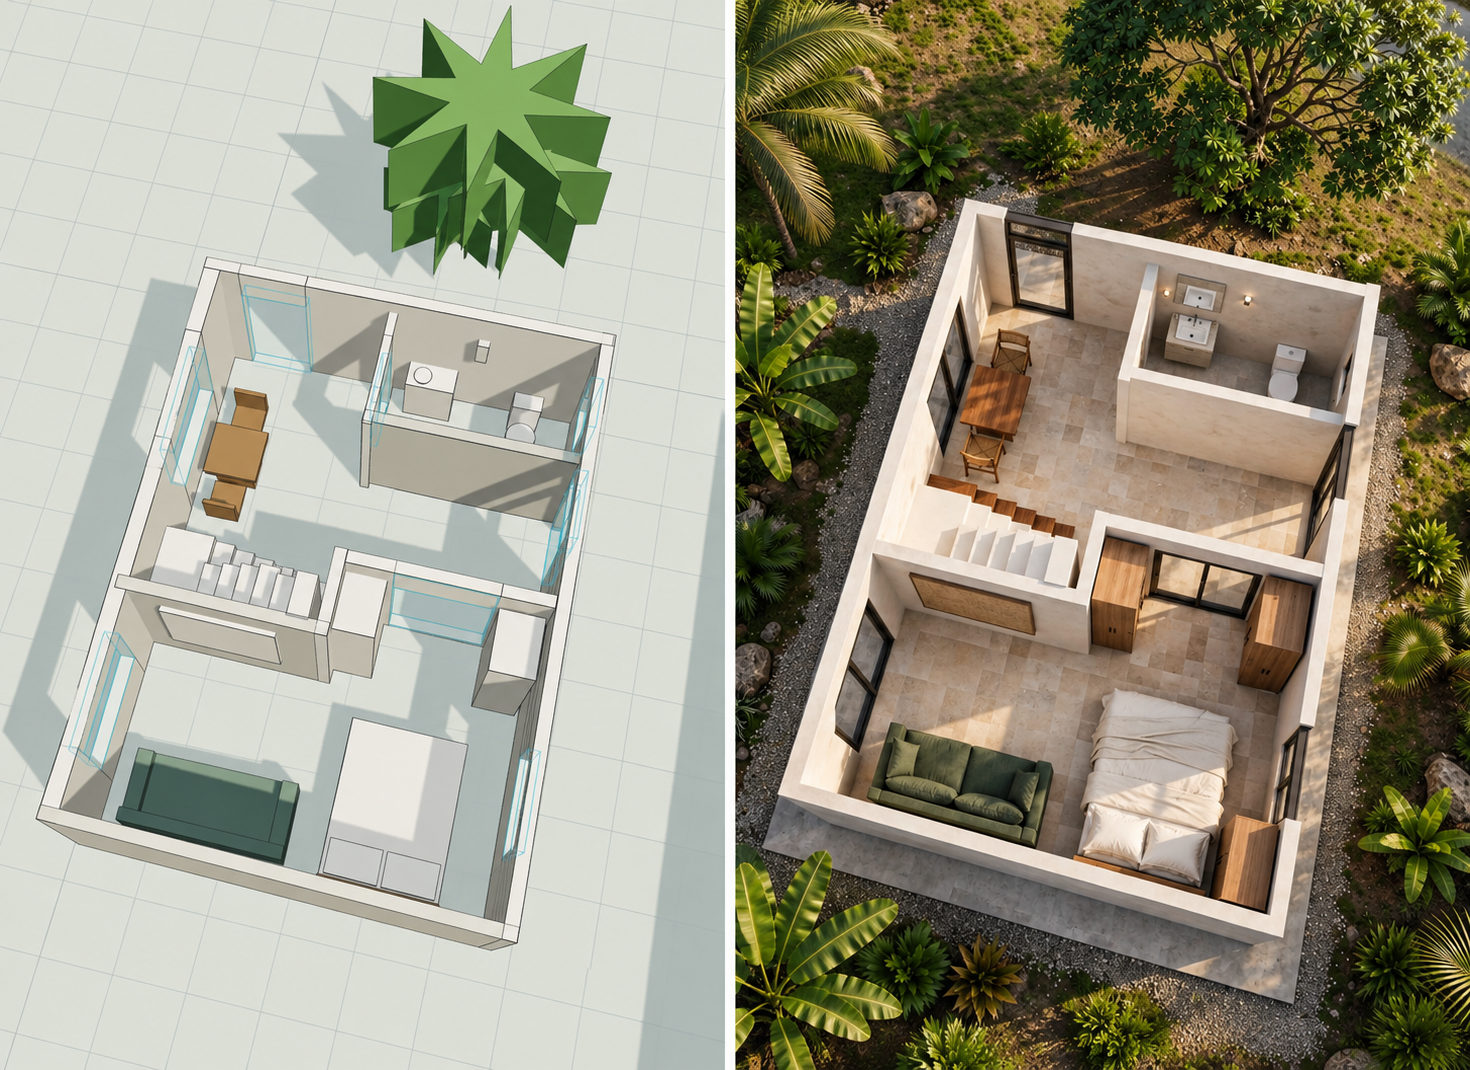
MAKE IT REAL
Hands you the prompt that turns a screenshot of this model into a
photoreal picture in any AI image tool. Line up the view, tap the
camera, copy the prompt, attach the PNG.
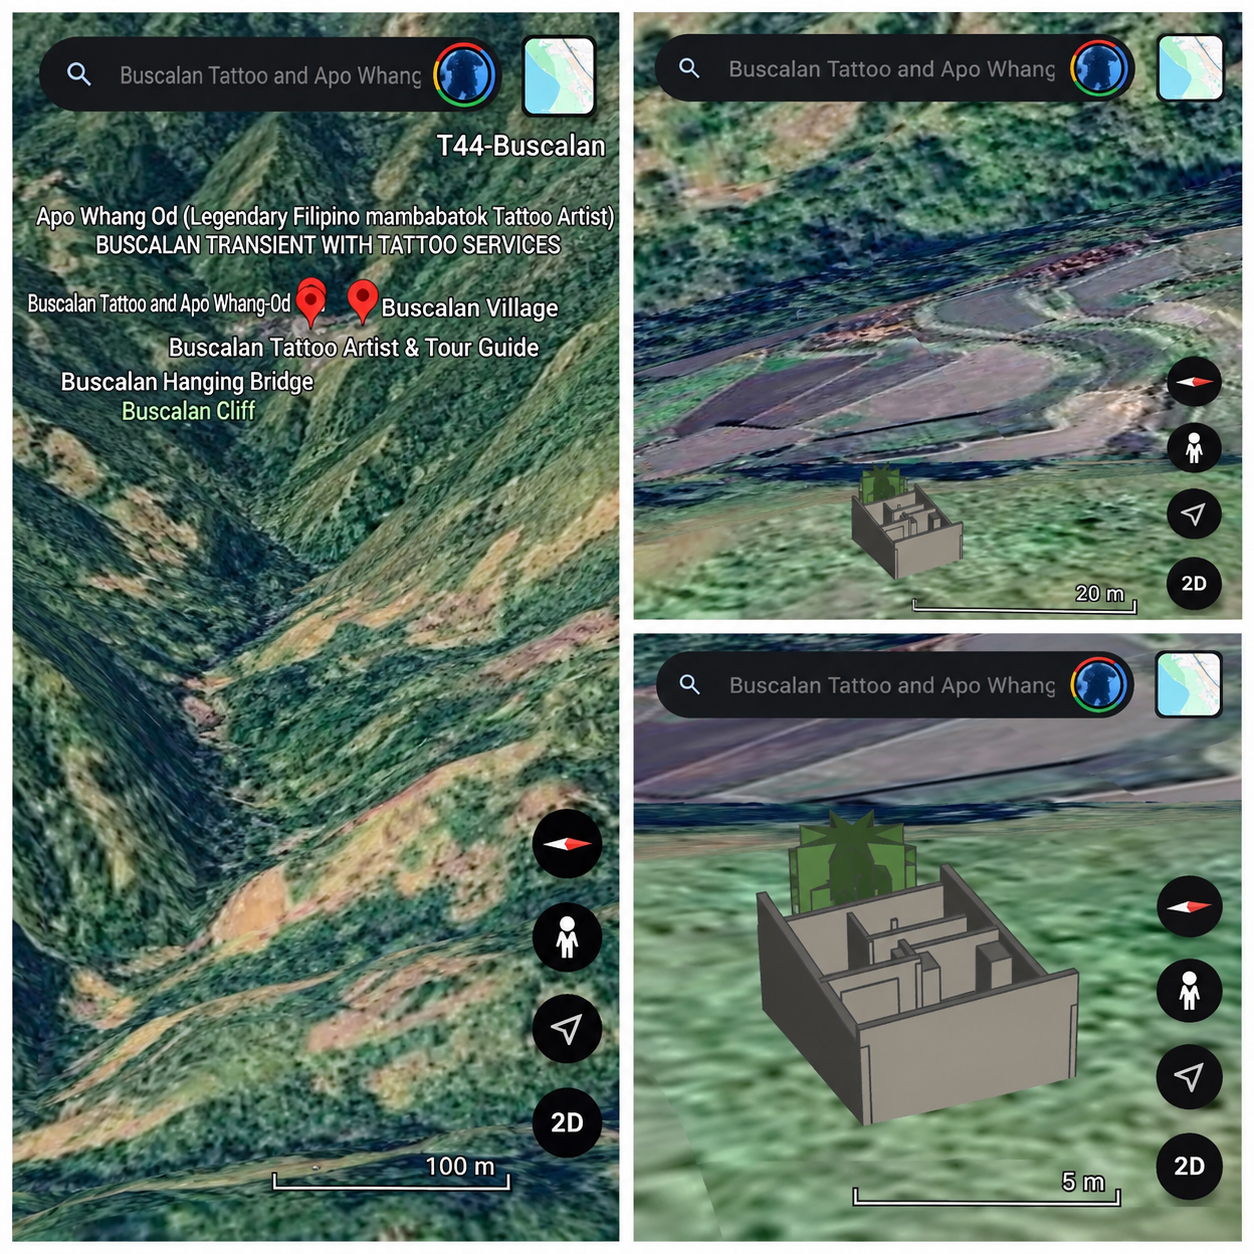
GOOGLE EARTH
Puts the building on the real ground. See section 6.
SHOW Switches every measurement between feet-and-inches and straight
inches, or metres and millimetres. Handy while nudging.
FREEZE Locks everything loose so it can't be nudged, and leaves what's
already frozen alone. Build a bit, freeze it, build the next bit.
The number on the chip is how many parts are still loose.
Unfreeze all releases the lot, and the press-and-hold lock has
its switch in there too.
CLEAR ALL
Wipes the whole model. One tap arms it and the chip asks SURE,
the second tap does it. Undo brings everything back.
============================================================
5. NAMING AND FURNISHING ROOMS
============================================================
With ROOMS on, tap the orange "+ name" floating in any room. A panel
opens with twelve one-tap names, a text field for anything else, and
arrows to step through every room in the model so none is unreachable.
Names are saved in this browser and survive reopening a model.
FURNISH THIS ROOM is the orange button in that panel. Name the room, tap
it, and it fills:
Bedroom queen if there's walking room both sides, otherwise a
double, against the longest wall with no door in it.
Nightstands and a wardrobe if there's space.
Living sofa against the longest doorless wall
Dining the ten-seater if the room is big enough, the six otherwise
Kitchen counter run along the longest free wall, fridge on the next
Bathroom toilet and vanity along one wall, shower opposite
Office, Closet, Garage, Laundry, Porch each get the obvious thing
Doors are avoided. It won't stand a bed across a doorway. If something
won't fit it says why with the number: "A bed needs 6' 11" and this room
has 5' 3"."
============================================================
6. PUTTING IT ON THE REAL GROUND
============================================================
Tap GOOGLE EARTH. Type the latitude and longitude of the spot, or tap
Use my location. Facing is the compass bearing the top of your plan
points, 0 north, 90 east.
NUDGE IT INTO PLACE without retyping anything: North, South, West, East
by 5, 10 or 25 ft, turn by 1 or 5 degrees either way, or a quarter turn.
A line underneath reads back exactly where it sits.
SITS LEVEL plus a pad height puts the building on a flat pad at that
elevation, which matters on a slope. Leave the pad blank and it follows
the ground, which can never be buried by terrain.
SAVED SITES. Name a placement and save it. Load brings back the
coordinates, facing, offsets and pad in one tap. It also remembers the
last placement you used on its own.
Download KML, then open it in Google Earth. The file is named for its
placement, so a folder of attempts tells you which is which.
============================================================
7. THE FLOOR PLAN
============================================================
Tap the folded map icon.
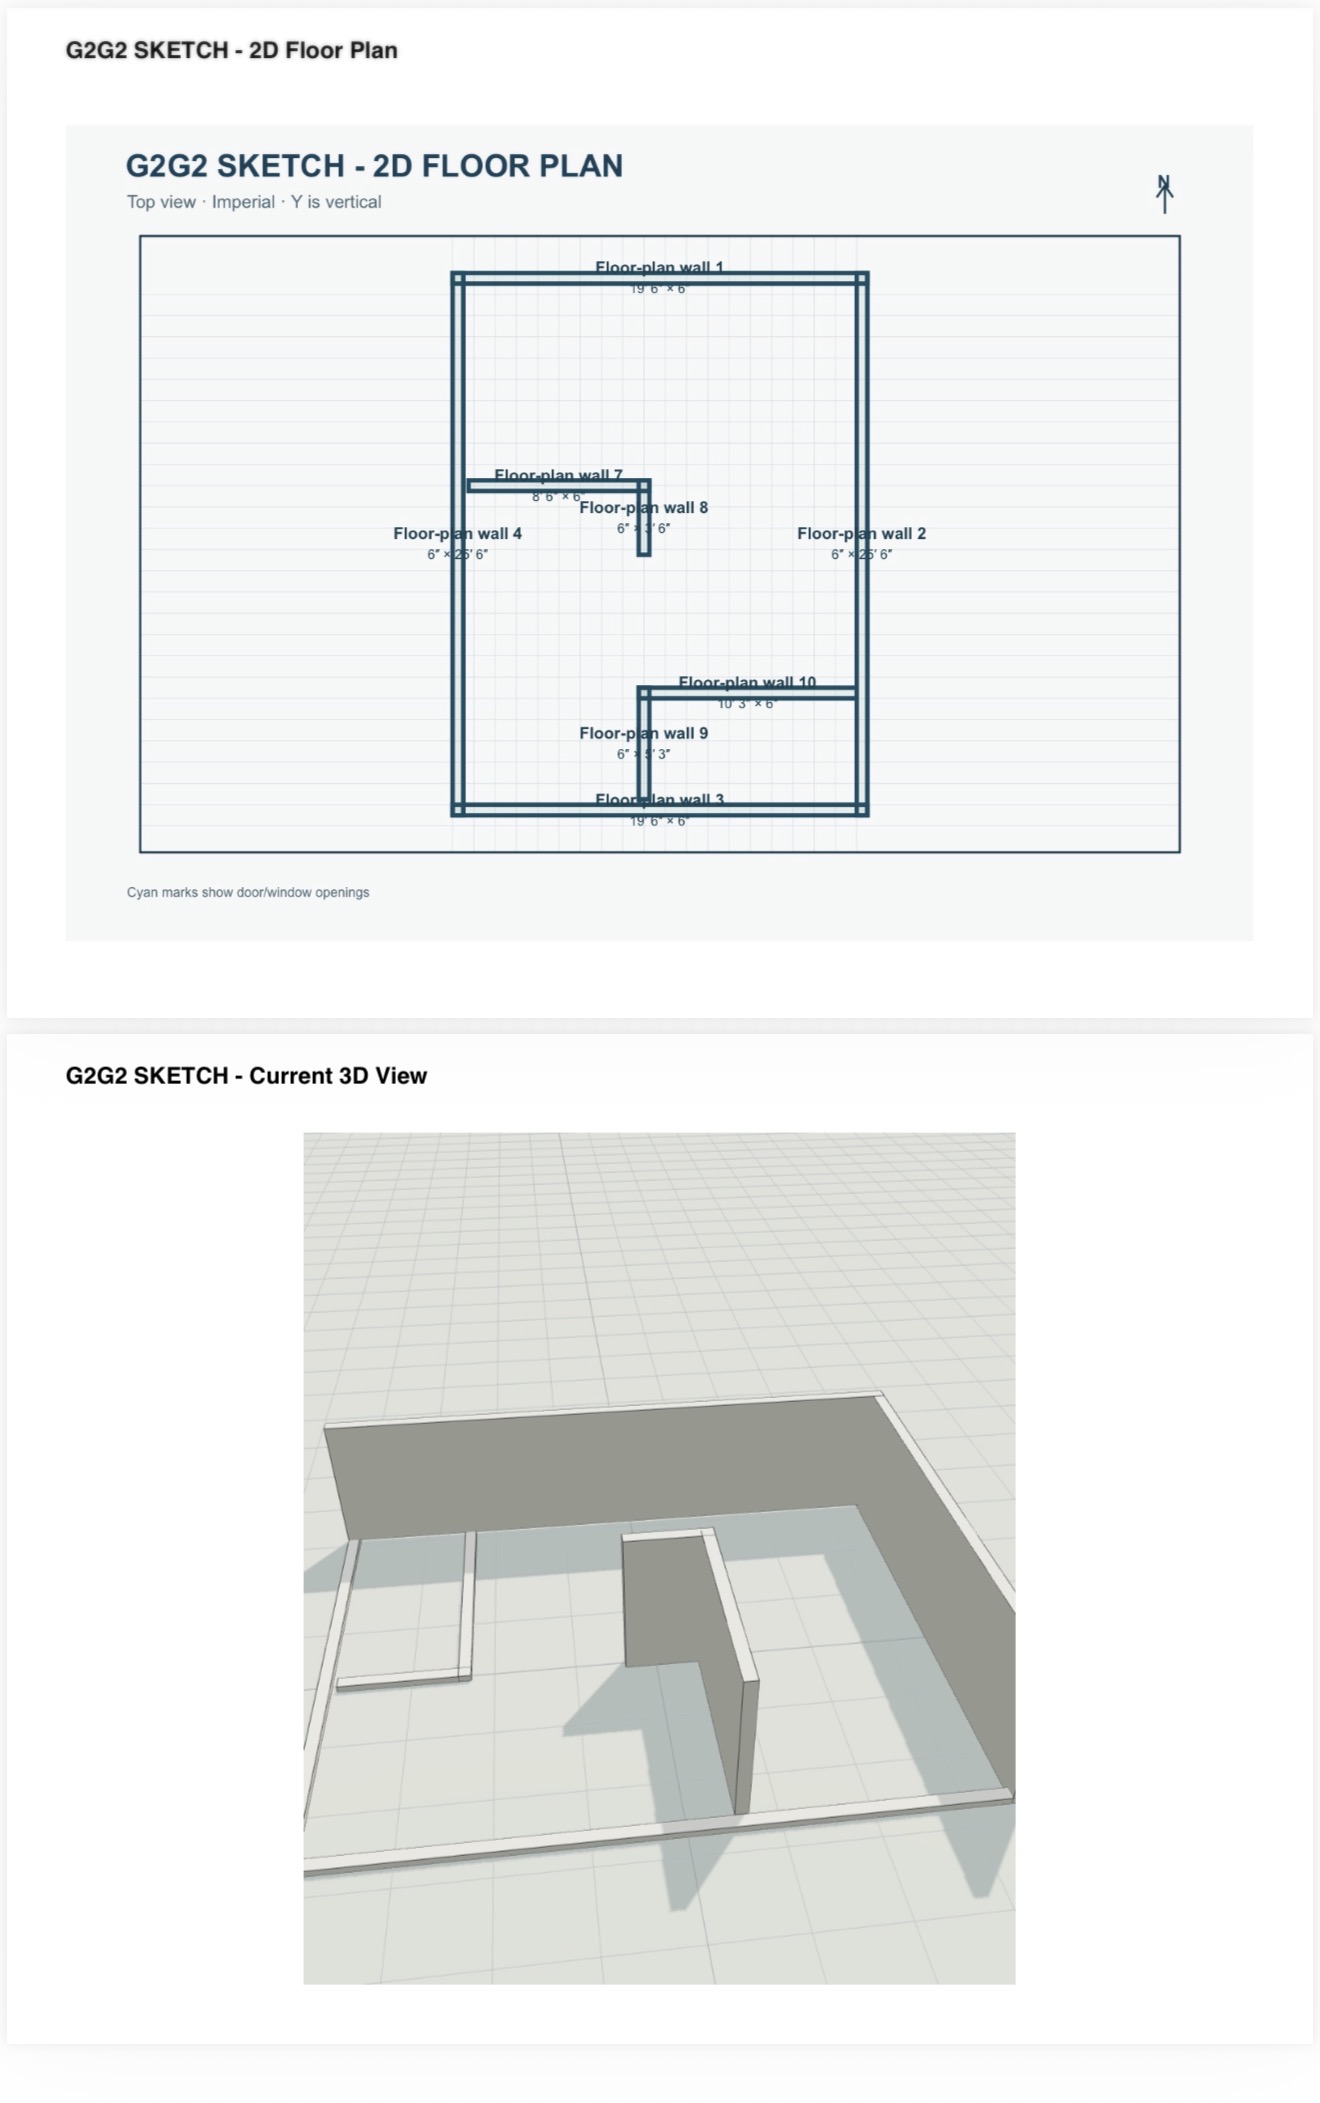
It's drawn as a real plan, meaning a horizontal cut at 4 ft. Walls the
cut passes through are filled solid. Furniture and anything below the cut
is a thin dashed outline. Roofs aren't drawn at all, because they're
above the cut.
What's on the sheet:
Door swings, a dashed arc and a leaf line on every door
Openings marked in cyan
Running dimension strings along the top and down the left, with a tick
at every wall face and every opening edge, measured to the face
Overall width and depth
Every room's name and area
A title block with the approximate scale at A4, the date and the units
A scale bar
A north arrow
ONE PAGE PER STRUCTURE. If your model has more than one building, each
gets its own page at its own scale. The viewer shows the largest and says
"Structure 1 of 2"; the PDF contains them all.
The PDF is portrait and ends with the current 3D view.
============================================================
8. BLOCK AND COST TAKEOFF
============================================================
Tools, then the concrete block takeoff. It reads every wall in the model,
subtracts the openings, and gives you blocks, cement bags, sand and
rebar. Choose 4, 6 or 8 inch block.
Fill in your local prices and your mason's mortar allowances and it
totals the lot. Cement and rebar round up to whole bags and whole
lengths, because that's how you buy them.
============================================================
9. DRAWING BY HAND
============================================================
The loop is: draw a footprint, pull it up, slide it into place.
Square / rectangle, Circle or Triangle. Drag a footprint on the grid.
Push/Pull. Drag it up, or type 8 ft, 32 in, 2.4 m, 450 mm and Apply.
Move & snap. Drag it. Release near another shape and it seats on it.
Triangle has a sliding point and per-side heights, so you can build real
slopes. Gable roof adds a roof to a box's top face in one tap. Window /
door opening cuts a real hole through any face.
Rough floor plan lets you trace wall centrelines with one finger. It
straightens your corners and builds connected walls you can lift
together.
Free / X / Y / Z locks a drag to one direction. Work plane is the height
you're drawing at; raise it, or select a solid and choose Use object top,
and you're drawing upstairs.
============================================================
10. IT TALKS BACK
============================================================
To text turns whatever you've drawn into plain text you can copy into a
chat: "make the back wall 4 feet deeper and put two windows on the north
side." Paste the answer back and tap Clear & draw.
Room names and areas ride along in the exported text as comments.
============================================================
11. IF SOMETHING SEEMS ODD
============================================================
Two rooms showing one number
The wall between them has a gap. Stretch it until it touches.
Tapping one wall lights up the whole building
It's grouped. Tap Ungroup in the Paste a drawing panel.
Push/Pull won't grab a face
It's grouped, frozen, or locked purple. Press and hold to unlock.
A pasted drawing didn't appear
Check the last line really says END_OBJECT. Long pastes get cut off by
the phone's clipboard. Split it and use Draw it for the second half.
A door or window won't drag
Don't try. Tap it and use the pad that appears. Move and Size buttons,
in 1 in, 3 in, 6 in or 1 ft steps.
Buttons missing from a panel
You're on an old copy of the page. Force a reload.
Everything vanished
Undo goes back sixty steps, or Tools then Restore.
============================================================
12. WHAT IT ISN'T
============================================================
Curved walls, apart from round towers. Hip roofs, since it does flat and
gable. Arches. Terrain and slopes. Not engineered, not to code, not a
permit drawing.
It's for working out how big things are and where they go, fast, before
you commit to anything.
Leave a comment
Log in with itch.io to leave a comment.